
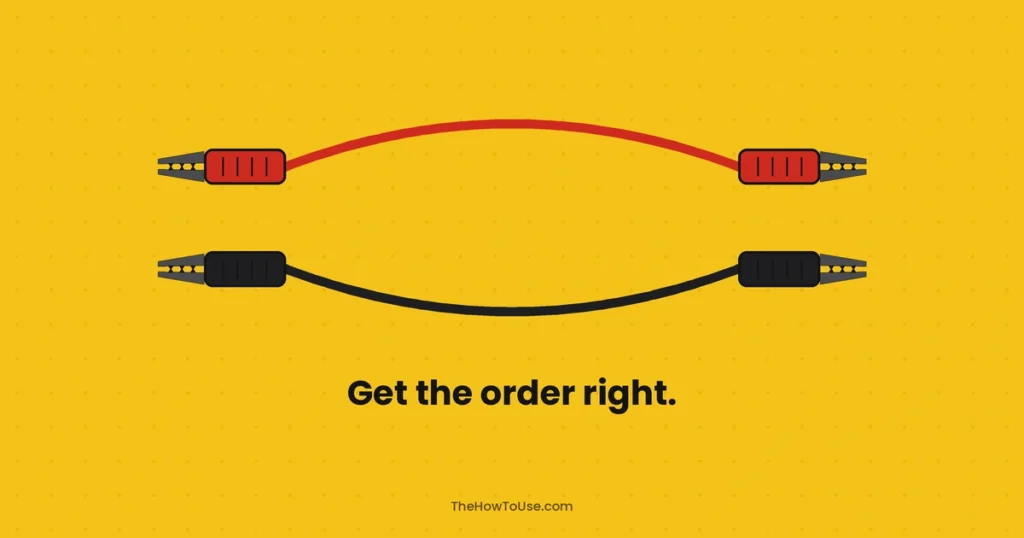
Jumper cables are a set of highly insulated cables fitted at each end with a clamp. The principle behind them is that they allow a battery that is still working to transfer power to a battery that is no longer working. Knowing how to use jumper cables is relatively simple and can be summarized in four steps: connect the red clamp to the positive terminal of the dead battery, the other red clamp to the positive terminal of the fully functioning battery, the black clamp to the negative terminal of the good battery and the other black clamp to a piece of bare metal on the damaged car.
Once the good car has started, one can try starting the damaged car and disconnect the cables in reverse order. There are a lot of manufacturers producing jumper cables such as Energizer, Schumacher, Amazon Basics, Cartman, EPAuto but the process does not change depending on the manufacturer.
That order isn’t fussy, by the way. It’s there so the one unavoidable spark happens nowhere near a battery that can leak flammable hydrogen gas. This guide starts with the step-by-step, then gets into safety checks, what goes wrong when clamps end up in the wrong place, motorcycles, hybrids and EVs, starting a car without cables, and straight answers to the questions people search for most. It’s all general guidance. If your owner’s manual says something different, the manual wins.
How to Use Jumper Cables: Step-by-Step
Same routine every time, whatever the cars involved. Read it through once before touching a single clamp.
Step 1: Park close, but not touching.
Close enough for the cables to reach. Not so close that the two cars touch. Engines off on both, parking brakes on, lights and accessories switched off.
Step 2: Find the terminals.
Pop both hoods. Positive is marked +, usually with a red cover over it. Negative is marked −. Crusty buildup hiding the markings? Wipe it off first.
Step 3: Red clamp to the dead battery’s positive.
Give it a little wiggle so it’s actually biting into the metal.
Step 4: Other red clamp to the good battery’s positive.
Positive to positive. Done.
Step 5: Black clamp to the good battery’s negative.
Now the loop starts closing.
Step 6: Last black clamp to bare metal on the dead car.
Unpainted and sturdy, like an engine bracket or a thick bolt, and well away from the battery, the belts, and the fans. Not the dead battery’s negative post. This is the step people get wrong.
Step 7: Start the good car, then the dead one.
Let the good car run a few minutes first. Then try the dead one. Once it’s running, leave it running.
Step 8: Take everything off in reverse order.
Details are in the disconnecting section below.
The short version, for anyone skimming:
Red to dead, red to good, black to good, black to bare metal. Start the good car, start the dead one, remove in reverse.
Before You Connect: Safety Checks
Thirty seconds of looking around saves a lot of grief. Start with the owner’s manual. Some cars hide the battery under a seat or in the trunk, and some have a dedicated jump terminal under the hood instead. Worth knowing before the cables come out.
Next, look at the dead battery itself. Cracked case? Bulging sides? Leaking fluid, a strong rotten-egg smell, ice on it in freezing weather? Stop right there. Don’t jump it. More on that near the end.
Both batteries need to be 12-volt, which covers nearly every passenger car, and both engines stay off while the clamps go on. No smoking, no lighters, no open flame anywhere close. Eye protection is cheap insurance, and gloves too if there’s a pair handy. Dangling jewelry and loose scarves come off before anything swings into a clamp or a belt. Give the cables a quick once-over for cracked insulation or bent clamps. And once a clamp is sitting on a battery, don’t let the other clamps touch each other, or any metal. Clamps hooked to a live battery spark the second they meet.
Jumper Cable Connection Diagram (Positive, Negative, and Where Each Clamp Goes)
Think of it as four clamps and one path.
| Order | Clamp | Where it goes |
| 1 | Red | Dead battery, positive (+) |
| 2 | Red | Good battery, positive (+) |
| 3 | Black | Good battery, negative (−) |
| 4 | Black | Unpainted metal on the dead car, away from the battery |
Positive to positive goes first. Then the loop closes through the negative side, with the final connection made on the dead car’s bare metal instead of its battery.
Telling positive from negative is usually easy. Look for + and − molded into the case or the terminals. The positive post is often a bit bigger, and plenty of batteries have a red cap over it. If corrosion has crusted over the markings, wipe it with a rag or check the manual. And if it’s honestly unclear which is which, don’t guess. Reversed clamps are the one mistake that does serious damage, and the next section explains why.
A good grounding spot is a thick bolt on the engine block or a sturdy metal bracket, away from the battery, the fuel lines, and anything that moves. Bare metal only. Paint blocks the connection.

Why the Order Matters (and What Happens If You Get It Wrong)
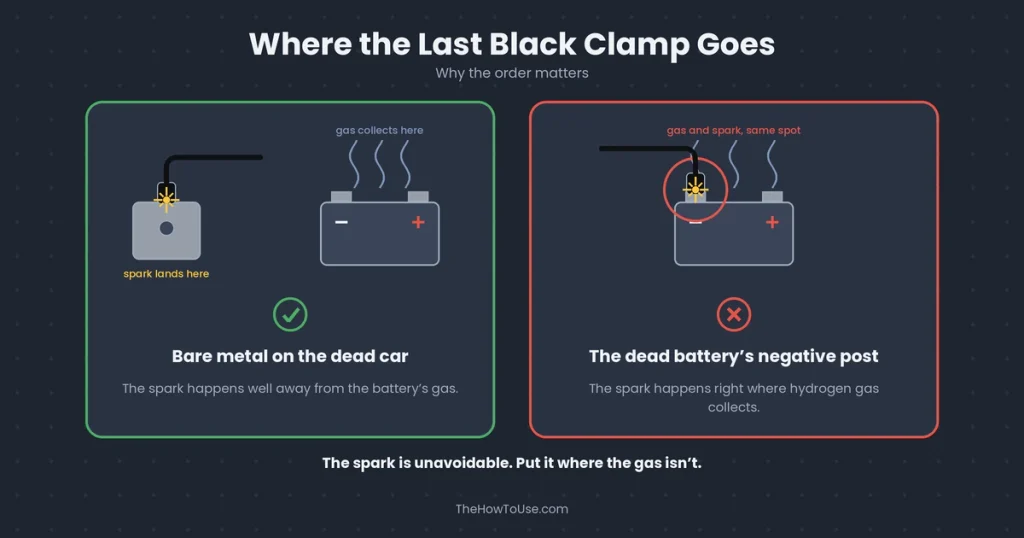
Here’s the part most guides skip. A lead-acid car battery can give off hydrogen, a flammable gas, especially when it’s drained or being charged hard. When the final clamp touches, the circuit completes and there’s a small spark. That can’t be avoided, since a live battery is being connected to a dead one. So the whole sequence exists to make that spark happen somewhere else.
Put the last black clamp on bare metal away from the battery, and the spark is nowhere near the gas. Clamp it straight onto the dead battery’s negative post, and the spark happens right where the gas collects. Explosions from this are rare, but they do happen. A 1994 NHTSA research note estimated roughly 440 people were injured by exploding batteries during jump-start attempts. Old number, same chemistry.
Wrong order mostly raises the spark risk. Reversed polarity is the bigger problem. A negative terminal is indicated with a red clamp while the positive terminal is indicated by black one, which means backward flow of current. As a result, there might be severe sparks, blown fuses, burnt wires and electronic devices like the onboard computer or alternator malfunctioning in a flash. The worst case scenario would mean the battery bursting.
As for whether jumping can ruin a battery, done correctly it won’t harm a healthy one. Repeated sloppy attempts, reversed clamps, or jumping a damaged or frozen battery can.
How to Disconnect Jumper Cables
Reverse the connection order exactly, and keep the revived car running the whole time.
- Black clamp off the bare metal on the revived car.
- Black clamp off the good battery’s negative.
- Red clamp off the good battery’s positive.
- Red clamp off the revived battery’s positive.
Always grasp the clamps by their insulated handles and avoid contact between two clamps or with any metal as long as the other end is still in contact with the battery. After that, ensure the cables are coiled, put them away and close both hoods. Always remove the ground clamp first to create an open circuit away from the battery, which is just the opposite of the procedure that has been described above.
After the Jump: How Long to Run the Engine and What If It Won’t Start
Yes, the dead car gets started while the cables are still connected. That’s the whole point. Start the good car first and give it a few minutes at idle so it can send some charge across, then try the dead one. Keep attempts short. If it doesn’t catch, wait a minute, check that the clamps are biting clean metal and sitting tight, let the good car run a bit longer, and try again. After a few failed tries, stop. Cranking forever just overheats things.
Once it fires up, don’t shut it off. Leave it running, or drive it, for a good while so the alternator can put some charge back into the battery. Guides commonly suggest somewhere around 15 to 30 minutes, and longer is better.
If the car dies again the next day, the battery is probably worn out, or something’s off with the charging system. A multimeter settles it fast. A healthy battery reads roughly 12.4 to 12.7 volts with the engine off, and around 13.5 to 14.5 volts with it running. Much lower than that, and it’s time for a proper test or a new battery. Check out our article for how to use multimeter.
And if it won’t start even with a solid jump, the culprit could be the starter, a poor connection, a fuel or ignition problem, or a battery too far gone to accept a charge.
How to Use Jumper Cables on a Motorcycle
Yes, with a few conditions. Both batteries need to be 12-volt, since some older bikes run 6-volt systems and that’s a hard no. And the car’s engine stays off. A running car’s charging system can push more voltage than a bike’s electronics like, and the car’s battery alone has plenty of power to turn a motorcycle over.
Connect the red wire to the positive side of the bike and the positive side of the car, and connect the black wire to the negative side of the car. The last black wire must be connected to a bare metal spot on the bike’s frame or engine. Make sure the connection is brief. Start the bike and disconnect in reverse order.
A few guides do say to run the car. Most advise against it, and engine-off is the more cautious route. Another motorcycle as the donor, or a portable jump starter, is safer still. Clamps built for car batteries can be awkward on a small bike battery, so take it slow.
How to Jump-Start a Hybrid or Electric Car
Hybrid cars and EVs are equipped with a standard 12volt battery that provides enough power to run the computers, locks, and systems that get the high-voltage battery started. If the 12volt battery goes dead, the entire vehicle is dead even if the battery pack is fine. In most instances, the dead 12volt battery can be jumpstarted from a standard vehicle.
But the owner’s manual comes first. Many models have a specific jump terminal under the hood or in a fuse box, and some tuck the battery into the trunk. Stay clear of the thick high-voltage cables, usually bright orange, which have nothing to do with a jump-start.
Using a hybrid or EV as the donor is murkier. Sources disagree, and several manufacturers advise against it. So the rule is simple: only do it if the manual explicitly says it’s fine. Otherwise, find a conventional car, use a portable jump starter, or call roadside help. The clamp order and the bare-metal ground apply either way.
How to Jump-Start a Car Without Cables
No cables? A few ways around it.
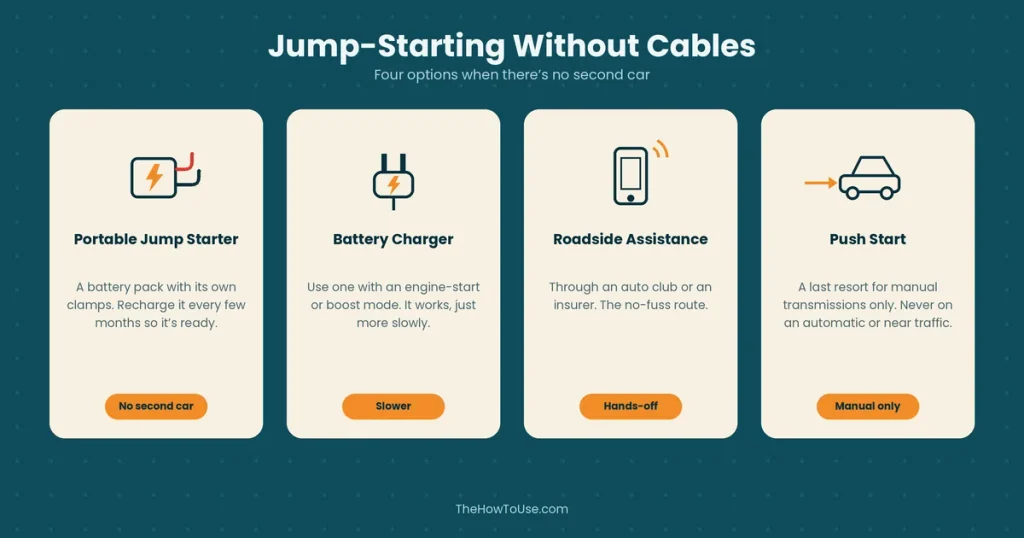
A portable jump starter is a battery pack with its own clamps. Connect it to the dead battery, switch it on, and start the car. No second vehicle needed. Many models include reverse-polarity protection, which is a real safety upgrade, though they need recharging every few months to be ready when it counts, and instructions vary by model.
A battery charger with an engine-start or boost mode also works, just more slowly. Roadside assistance, through an auto club or an insurer, is the no-fuss route.
A push start, sometimes called a bump start, is a last resort that generally works only on manual transmissions. Ignition on, clutch in, second gear, get the car rolling with some help, then release the clutch. Never on an automatic, never anywhere near traffic, and it won’t work if the battery can’t power the ignition at all. Modern cars packed with electronics don’t always cooperate with it either.
Common Jumper Cable Mistakes to Avoid
A few slip-ups show up again and again.
Putting the last black clamp on the dead battery’s negative post is the classic. It’s exactly what the whole sequence is built to prevent. Letting clamps touch each other while connected is another. Reversing polarity, red where black belongs, does the most expensive damage. And skipping the owner’s manual causes trouble on cars with unusual battery locations or jump terminals.
Jumping a cracked, swollen, or frozen battery is dangerous. Cheap, thin cables can overheat and deliver weak current. Cranking too long burns time and stresses the starter. Shutting the engine off right after it starts leaves the battery barely charged. And leaving cables dangling near fans or belts, or leaning right over the battery while connecting, is just asking for trouble.
When Not to Jump a Battery (and When to Call for Help)
Some batteries shouldn’t be jumped at all. A cracked or leaking case, bulging sides, melted terminals, or a strong rotten-egg smell all mean stop. So does a frozen battery, which can happen in extreme cold, because jumping one can make it burst. And don’t mix voltages. Some large trucks run 24-volt systems, and a 12-volt car shouldn’t be connected to one.
If the manual says something different from this guide, follow the manual. If it’s dark, the weather’s nasty, the cars can’t be parked safely, or something just seems off, call roadside assistance. A tow costs less than a fried engine computer, or a trip to the emergency room.
Watch: How to Use Jumper Cables (Video Guide)
Plenty of people pick up the sequence faster watching it done once. Roadside-assistance groups, auto parts retailers, and carmakers all publish short demonstration videos, and searching “how to jump start a car” on YouTube turns up plenty more. Watch one alongside this guide. Pay close attention to where the last black clamp goes. If a video ends with it on the dead battery’s negative post, skip to a better one.
Frequently Asked Questions
What is the correct order to attach jumper cables?
Red to the dead battery’s positive, red to the good battery’s positive, black to the good battery’s negative, then black to bare, unpainted metal on the dead car, away from the battery.
How do I use jumper cables to start my car?
Connect the clamps in that order, start the good car and let it run a few minutes, then try the dead one. Once it’s running, remove the clamps in reverse order.
Do I connect black or red first?
Red goes first, on both positive terminals. The black clamps come second, with the last one on bare metal
Does the order you put on jumper cables matter?
Yes. The sequence keeps the final spark away from the battery, where flammable hydrogen can collect.
Can I start my car while jumper cables are connected?
Yes, that’s how a jump-start works. Start the good car first, then try the dead one while everything’s still connected.
What happens if you put jumper cables on in the wrong order?
It raises the chance of a spark near the battery, and that’s the dangerous part. Crossed polarity is worse, and the section above covers it.
Can you ruin a car battery by jumping it wrong?
Yes. Reversed clamps, repeated sloppy attempts, or jumping a damaged or frozen battery can harm the battery and the car’s electronics.
What is the rule for jumper cables?
Red to dead, red to good, black to good, black to bare metal. Positive to positive, and never the last clamp on the dead battery.
What happens if I put jumper cables backwards?
Reversed polarity can cause heavy sparking, blown fuses, melted cables, and damaged electronics. In rare cases, a battery can vent or rupture. If it happens, stop, disconnect carefully by the insulated handles, and get the car checked before trying anything else.
How do you jump-start a car without cables?
A portable jump starter, a charger with a boost mode, roadside assistance, or, on a manual transmission only, a push start.
Key Takeaways
Using jumper cables safely comes down to one sequence and one reason behind it. Red to dead, red to good, black to good, black to bare metal, so the final spark lands away from the battery. Check the battery and the owner’s manual first, start the good car, then the dead one, and take it all off in reverse. Hybrids, EVs, and motorcycles follow the same logic with a few extra rules worth knowing, and if a battery looks damaged or frozen, calling for help beats jumping it. Once the car’s running, give it time to recharge, and if it dies again, the battery or the charging system needs a proper look.
Head back to the The How To Use to browse more no-fluff guides across every category.