

An air fryer is a compact countertop appliance that cooks food by blasting it with super-hot, fast-moving air. That’s it, that’s the trick. It crisps the outside the way deep frying does, minus drowning everything in oil first. Here’s the part nobody tells you before you buy one, though: it’s not actually oil-free. Most foods still want a teaspoon or two for decent texture. Way less than a deep fryer needs, sure, but not zero, whatever the marketing on the box implies. Ninja, Philips, Instant Pot, Cosori, pretty much every brand builds these the same way underneath.
Heating element up top, a fan, a basket where the food sits. Learning how to use an air fryer really comes down to three things once you strip away the rest: preheat when it actually matters, don’t cram the basket, and have some rough sense of what temperature and time a given food wants. This guide gets into all of that. Chicken, fries, reheating leftovers, dehydrating, which accessories are worth the money, and the handful of mistakes that wreck more first attempts than you’d think.
This guide is part of our growing Kitchen Appliances series — if you’re also getting the hang of your rice cooker, we’ve got a full step-by-step guide for that too
How to Use an Air Fryer: Step-by-Step
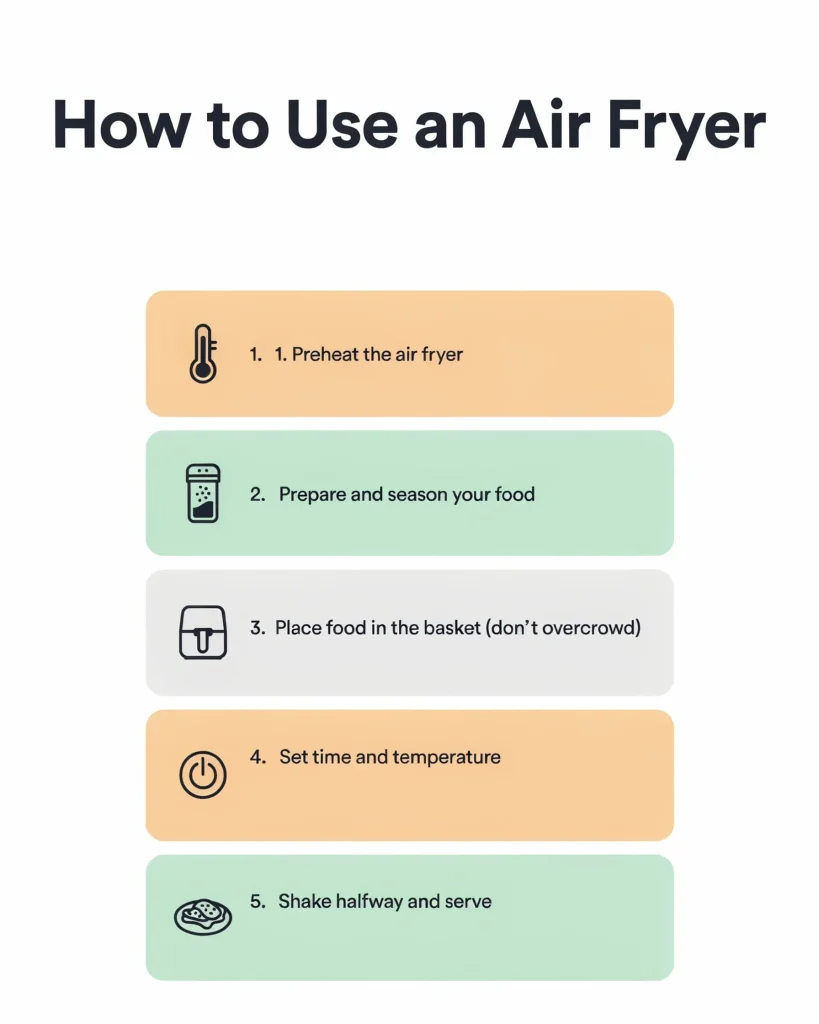
Every air fryer, whatever brand’s name is on it, runs through roughly the same routine. First time out of the box, and every time after that.
Step 1: Find it a decent spot.
Flat counter, heat-safe, a few inches of room on every side. Especially behind it, since that’s where the hot air actually vents out. Don’t shove it under a cabinet and forget about ventilation.
Step 2: Wash the removable parts first.
Basket, tray, warm soapy water, dry completely. Before anything cooks in it. Brand new unit? A lot of makers, Philips included, tell you to run it empty for a few minutes first, just to burn off whatever manufacturing residue is sitting in there.
Step 3: Preheat it.
Most have a button for this now. No button on yours? Run it empty at your target temperature for three to five minutes instead. Why this matters is a bit further down.
Step 4: Load the food. Don’t crowd it.
Single layer. Space between pieces, actual space, not just squeezed in slightly less tight. A light coating of oil, a teaspoon or so, helps most things crisp up right, though some naturally fatty foods barely need a drop of it.
Step 5: Set the temp and time. Shake it halfway.
Pull the basket around the midpoint, give it a shake, or flip the bigger stuff with tongs. Otherwise one side browns and the other just sits there pale.
Step 6: Check it’s done. Serve it.
Most air fryers pause the moment you pull the basket out, so peeking early costs nothing at all. Thermometer for meat. Oven mitts for the basket, it’s hotter than it looks.
The short version, for anyone skimming:
Preheat, don’t overcrowd, shake halfway, check meat with a thermometer instead of just guessing.
What Is an Air Fryer and How Does It Work?
Strip away the countertop-friendly shape and what’s actually in there is basically a tiny, very efficient convection oven. Nothing more exotic than that. Heating element near the top, a fan right below pulling that hot air down and whipping it around whatever’s in the basket. All that moving air is what crisps the surface. Same browning reaction as deep frying, just air doing the work instead of a vat of oil.
Since the air’s doing the heavy lifting, food comes out lower in fat than the deep-fried version, noticeably so. Texture lands close, though not identical if we’re being honest about it. A touch less greasy. Occasionally a bit drier if something sits in too long. Close enough, though, that most people stop missing the deep fryer within a week or two of owning one of these.
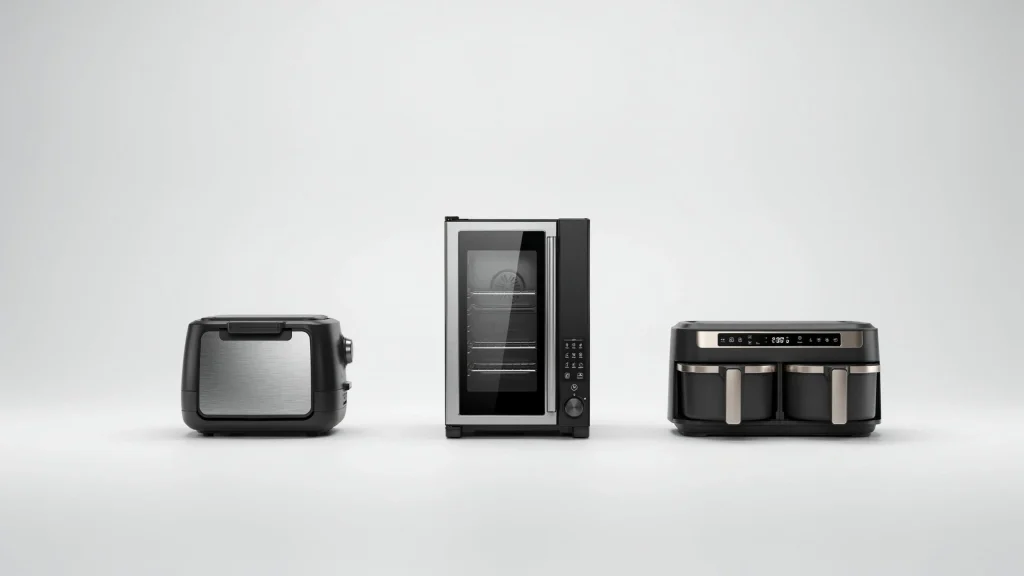
Types of Air Fryers (Basket, Oven, and Microwave Combo)
Not every air fryer looks the same or works quite the same way, and whichever type ends up on your counter changes a few small details in how you actually use it.
Basket-style is the classic boxy shape most people picture when they hear “air fryer.” Pull-out drawer, removable basket inside. Ninja and Philips both lean hard into this design. Easiest one to learn on, honestly, no real debate there.
Oven-style air fryers look more like a mini countertop oven. Front door, sliding racks instead of a drawer. They hold more food per batch and often throw in extras like rotisserie or a dehydrate setting you didn’t know you wanted until it’s there.
Microwave-air fryer combos squeeze both into one box. Handy if counter space is genuinely tight, though the air-fry side tends to underperform a dedicated machine just a little. Worth knowing before you buy one expecting miracles.
How to Preheat an Air Fryer the Right Way
Not everything needs preheating. Skip it on the wrong food, though, and you’ll notice immediately.
Frozen foods, fries especially, genuinely benefit from three to five minutes of preheat. The food starts cooking the second it hits a hot environment instead of slowly warming up alongside the machine like it’s along for the ride. Fresh, unfrozen stuff is more forgiving, can usually skip it without much loss either way. Got a dedicated preheat setting? Use it, obviously. Don’t have one? Run the empty basket at your target temp for that same three to five minutes before anything goes in.
Air Fryer Temperature & Time Chart (By Food)
Cook times shift a fair bit by brand and model. Treat this as a starting point, not gospel carved in stone somewhere. Check a few minutes early the first time you try something new, just to be safe about it.
| Food | Temperature | Approx. Time |
| Frozen french fries | 400°F (200°C) | 15–20 min, shake halfway |
| Chicken wings | 380°F (193°C) | 20–25 min, flip halfway |
| Boneless chicken breast | 375°F (190°C) | 18–22 min |
| Pork chops | 375°F (190°C) | 12–15 min |
| Fish fillets | 390°F (199°C) | 10–12 min |
| Frozen chicken nuggets | 400°F (200°C) | 10–12 min |
| Vegetables (chopped) | 375°F (190°C) | 10–15 min, shake halfway |
| Bacon | 350°F (175°C) | 8–10 min |
Rough rule for anything not on this list: take whatever temp an oven recipe calls for, knock it down 20 to 25°F. Air fryers just run faster and hotter than a regular oven. They always have.
How to Use an Air Fryer for Chicken (Including Raw Chicken Safety)
Chicken’s probably the single most common thing that ends up in one of these. Fair enough, too, it comes out crispy outside without drying into shoe leather on the inside, which is more than you can say for a lot of chicken.
Raw chicken’s completely fine in an air fryer, by the way. Wings, breasts, thighs, drumsticks, all of it. As long as it actually hits a safe internal temp when it’s done. For wings: pat them dry first, matters more than you’d guess for getting them crispy, toss lightly in oil and seasoning, cook around 380°F for 20 to 25 minutes, flip halfway through.
For breasts, don’t eyeball it by time alone. Use an instant-read thermometer instead. Chicken needs 165°F internally no matter how you cook it, air fryer or otherwise. And bone-in cuts run longer than boneless does, so don’t assume the clock’s identical across every cut you throw in there
How to Use an Air Fryer for Fries and Frozen Foods
Frozen food is honestly where this thing shows off the most. Arguably better suited to an air fryer than almost anything else you’d ever cook in one.
Frozen fries go straight in. No thawing, shaken at least once halfway through for even crisping on all sides. Most freezer-aisle stuff, nuggets, mozzarella sticks, dumplings, follows the same basic pattern: no extra oil needed since there’s usually some already baked into the coating, single layer, shake partway.
Fresh-cut fries are a bit different and do better with a light oil coating, maybe a quick soak in cold water first to pull some starch out. That’s what helps them crisp instead of going soft and, honestly, a little sad.
How to Reheat Food in an Air Fryer
Reheating leftovers is one of those uses nobody expects until they try it once. Then the microwave quietly stops being an option for anything crispy, ever again.
Fried chicken’s the classic case here. A microwave turns that crust soggy almost instantly, every single time, no exceptions. An air fryer running around 350°F for three to five minutes brings most of that crunch back, which a microwave just can’t pull off no matter how long you run it. Same idea applies to pizza, fries, most fried leftovers really.
Lower temp than a fresh cook, shorter time, just enough to warm it through and re-crisp the outside without drying out whatever’s underneath.
Dehydrating and Other Air Fryer Functions
A lot of air fryers, oven-style ones especially, come with a dehydrate setting that most people never actually touch. Sitting there, unused, the whole time they own the thing.
Dehydrating runs the fan at a much lower temp, somewhere around 125°F to 160°F, for hours instead of minutes. Slowly pulling moisture out of thin-sliced fruit, vegetables, even jerky, rather than cooking them outright like everything else this appliance does. It won’t replace an actual dedicated dehydrator if you’re doing serious batches regularly.
But for an occasional tray of dried apple slices? Does the job fine, no need to buy yet another appliance for the counter.
Air Fryer Accessories and Liners Worth Having
You really don’t need much beyond what came in the box. A few extras do genuinely make life easier, though.
Parchment liners, the kind made specifically for air fryers with holes punched through for airflow, cut cleanup down a lot. Worth keeping a stack around.
Silicone liners do the same job and are reusable, pricier upfront but cheaper over time if you’re using it most days. A couple other things worth grabbing while you’re at it: silicone-tipped tongs so you’re not scratching up the non-stick coating every time, and an instant-read thermometer.
That last one earns its keep the very first time it saves your chicken from being underdone in the middle.
Foods You Shouldn’t Cook in an Air Fryer (and Its Real Downsides)
This thing’s genuinely good at a lot. Not everything, though, and a few foods are worth just skipping entirely rather than fighting with them.
Wet-battered stuff, think traditional beer-battered fish, tends to fail badly. That batter needs hot oil to set properly, and it just drips everywhere in an air fryer instead of crisping up the way it should. Fresh leafy greens get tossed around in that circulating air and can scorch before they even wilt properly.
Anything with loose, melty cheese on top can drip through the basket holes onto the heating element below, which is messy at best and occasionally a small smoke scare at worst. As for real downsides, since there are a few: basket capacity’s genuinely limited compared to an oven, so feeding a crowd means cooking in multiple rounds. And some foods, bread in particular, just never quite get the texture a real oven gives them. No matter how long you leave it in there.
Common Air Fryer Mistakes to Avoid
A handful of habits show up over and over with people who are new to this. Same ones, pretty much every time.
Skipping preheat on frozen food is a big one. Leads to soggier results than you’d expect, every time. Overcrowding the basket is probably the single biggest mistake overall, though, air needs room to actually move around each piece, and piling things up just blocks that entirely.
Not shaking or flipping halfway through leaves one side crispy and the other pale and, frankly, a little sad looking. Dumping in way too much oil defeats half the point of owning the thing and can cause smoking too. And trusting the clock over an actual thermometer for meat is a habit worth dropping early on, since every single air fryer runs just a little differently from the next one.
How to Clean an Air Fryer
A quick clean after most uses keeps this thing running well for years. Doesn’t take long at all, honestly, people just assume it will.
Let it cool down completely first. Obviously, but worth saying anyway. Pull the basket and tray, hand-wash in warm soapy water, most are non-stick so skip anything abrasive that’ll scratch the coating up. Wipe down the interior and the heating element area with a damp cloth to catch grease splatter before it builds into something worse down the line. Stuck-on residue? A short soak in warm soapy water loosens it up way better than scrubbing at it ever will. Dry everything fully before putting it all back together.
Watch: How to Use an Air Fryer (Video Guide)
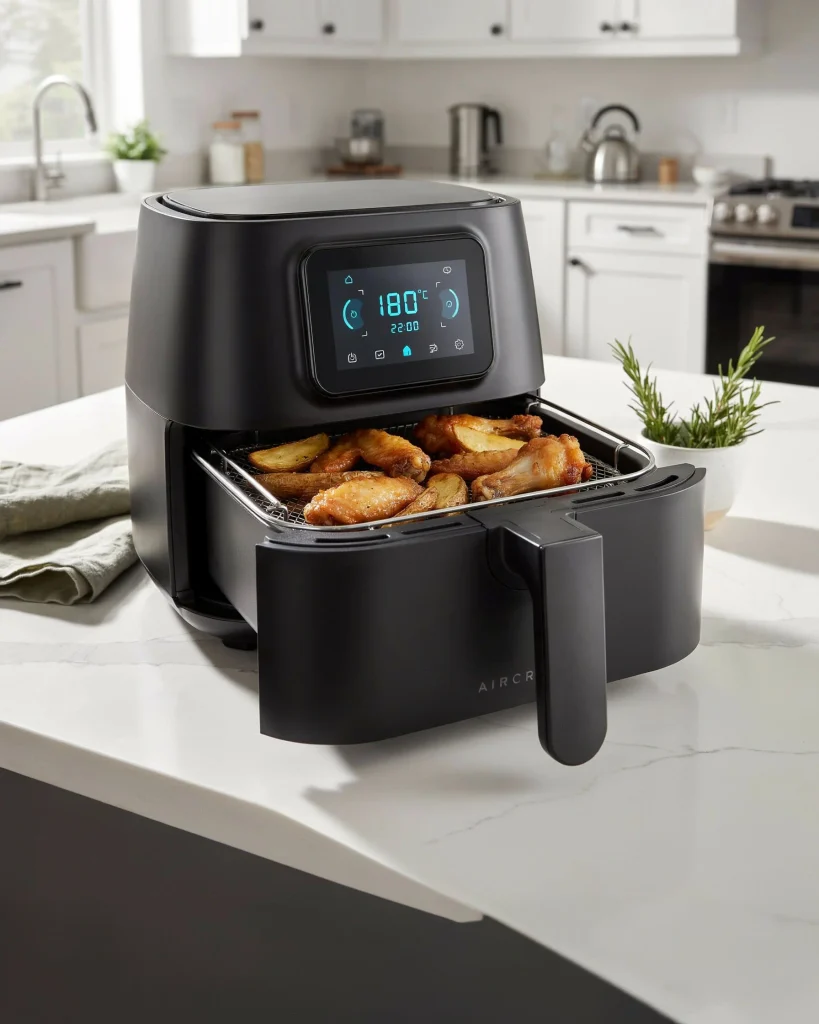
Some of this genuinely clicks faster watching someone’s hands move through it once, instead of reading yet another paragraph explaining the same motion. Plenty of solid, well-reviewed air fryer tutorials are out there on YouTube. Everything from total-beginner basics to specific brand walkthroughs for Ninja, Philips, whatever’s popular this year.
Frequently Asked Questions
Do you put food straight into the air fryer, or does it need anything first?
Straight in, mostly. A light coating of oil helps most things crisp better, but it’s not strictly required across the board, especially for foods that already carry some fat of their own going in.
What’s the first thing I should cook in a new air fryer?
Frozen french fries, hands down, no contest really. Forgiving, fast, and gives you an immediate read on whether your particular model runs hot, cool, or dead on with its stated temperatures.
What are the best air fryer brands for beginners?
Ninja, Philips, Cosori, Instant Pot. All solid, beginner-friendly picks with simple dial or touchscreen controls and enough preset programs that you’re not calculating everything from scratch on day one of owning it.
Are there real disadvantages to air frying?
A few, yeah, might as well be upfront about it. Smaller basket than an oven, so bigger batches mean cooking in rounds. Some foods, bread and delicate pastries especially, never quite get the texture a real oven gives them. And again, it’s not actually oil-free. Just lower-oil than deep frying.
How long should I preheat my air fryer?
Three to five minutes covers most situations. Frozen food benefits the most from it, by far. Fresh, unfrozen food can often skip the step without much of a difference either way, honestly.
How do you use an air fryer for beginners?
Using an air fryer for the first time is easy: you simply unbox and clean the basket, place the unit on a flat surface, add your food in a single layer without overcrowding, and set the temperature and time manually.
Key Takeaways
Using an air fryer well really comes down to a few habits sticking, that’s genuinely most of it. Preheat when the food actually calls for it. Give everything room instead of crowding the basket. Shake or flip things halfway so they brown evenly all around instead of just on one side.
Once that’s second nature, the temperature chart above covers most of what you’ll ever cook, and the accessories, the dehydrate function, the reheating trick, those are just bonuses stacked on top of that same basic routine underneath it all. It’s not magic. It’s definitely not oil-free, whatever the box implies. But it earns its spot on the counter fast once you figure out what it’s actually good at.
Head back to the homepage to browse more no-fluff guides across every category

