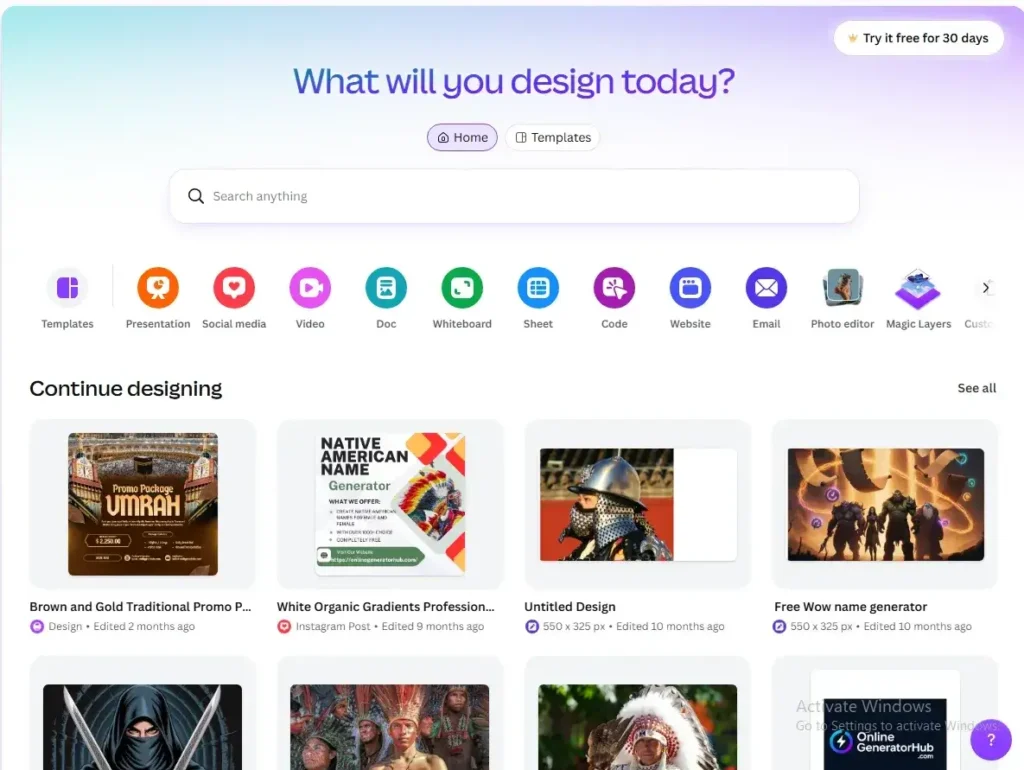
Canva is a free-to-use online design tool that lets pretty much anyone put together social media posts, presentations, resumes, flyers, videos, and just about anything else visual, all without needing to actually know graphic design.
It’s mostly used for exactly that kind of everyday design work, the stuff a small business, a student, or a content creator needs constantly but can’t justify hiring a designer for every single time. And yes, Canva really is easy for beginners, genuinely. That’s kind of the whole point of it existing. The interface is drag-and-drop, most designs start from a template instead of a blank page, and you honestly don’t need any prior design experience to end up with something that looks decent on the first try. This guide is part of our growing library of step-by-step how-tos — you can read more about how we put these together on our About Us page
Learning how to use Canva properly really comes down to a handful of things: setting your design up at the right size, working with templates and elements instead of building from scratch, and knowing which tools actually live where in that side menu. This guide walks through all of that, plus Canva’s AI features, using it on your phone versus your laptop, the free-versus-Pro question everyone eventually asks, and how people are actually using it to make money on the side.
How to Use Canva: Step-by-Step
Every Canva project follows roughly the same path, whether you’re making a quick Instagram post or a full presentation deck.
Step 1: Create an account.
Head to canva.com and sign up, either with an email address or by signing in through Google or Facebook. It’s free, no card needed just to get started.
Step 2: Pick a design type and size.
From the homepage, choose what you’re actually making, an Instagram post, a resume, a presentation, whatever it happens to be. Canva sets the canvas to the right dimensions for that format automatically, so there’s no need to go look up pixel sizes yourself.
Step 3: Choose a template or start blank.
Search the template library for something close to what you’re after (typing “birthday invitation” or “business flyer” works well), and click it to load it into the editor. Starting from a template is genuinely the fastest way to get somewhere decent, even if you end up changing most of it anyway.
Step 4: Customize it.
Swap out text, photos, colors, and fonts using the side menu. Nothing here is locked in until you say so, so it’s fine to just click around and experiment a bit.
Step 5: Download or share.
Once it looks right, hit Share in the top corner to download it as a PNG, JPG, or PDF, post it straight to social media, or send a link so someone else can view or edit it too.
The short version, for anyone skimming:
Sign up, pick a size, grab a template, customize it, download or share. That’s genuinely the whole loop.
Understanding the Canva Dashboard (Side Menu Explained)
The side menu is where basically everything lives, and once you actually know what each tab does, the whole editor stops feeling so overwhelming.
| Tab | What It’s For |
| Templates | Pre-made designs you can search by keyword and drop straight into your project |
| Elements | Shapes, icons, illustrations, stickers, and graphics to layer on top of your design |
| Text | Preset heading, subheading, and body text styles, plus Canva’s full font library |
| Uploads | Your own photos, logos, or files, stored so you can reuse them across projects |
| Draw | A freehand drawing tool, handy for quick annotations or just a more personal touch |
| Projects | Every design you’ve made, saved and organized automatically as you go |
Canva autosaves as you work, by the way, so there’s genuinely no “save” button to remember to hit.
How to Use Canva Templates
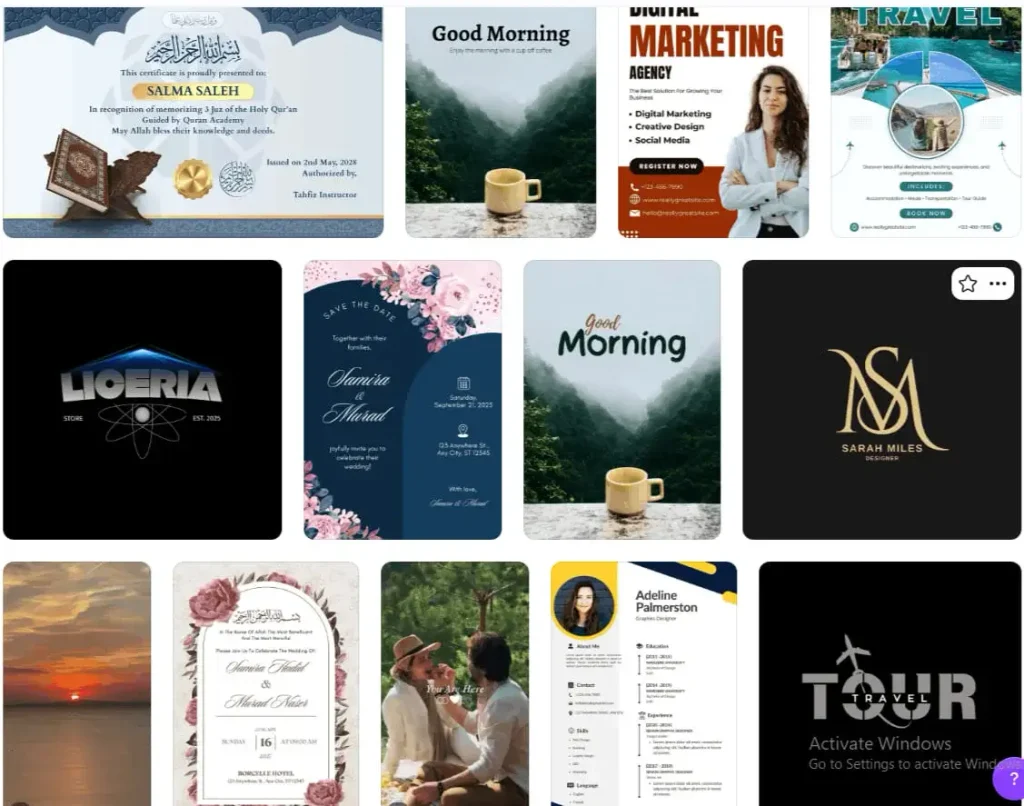
Templates are probably the fastest way to get from a blank idea to a finished design, and they’re built by actual designers, so the layout and spacing are already handled for you before you even start.
Type a keyword into the search bar up top, something like “wedding invitation” or “YouTube thumbnail,” and Canva pulls up dozens of options matching that theme. Click one to open it in the editor, then swap out the text, photos, and colors for your own stuff. Nothing stops you from mixing elements from one template into a totally different one either, so if you like the layout of one but the color scheme of another, just borrow both and combine them.
How to Use Canva’s AI Tools
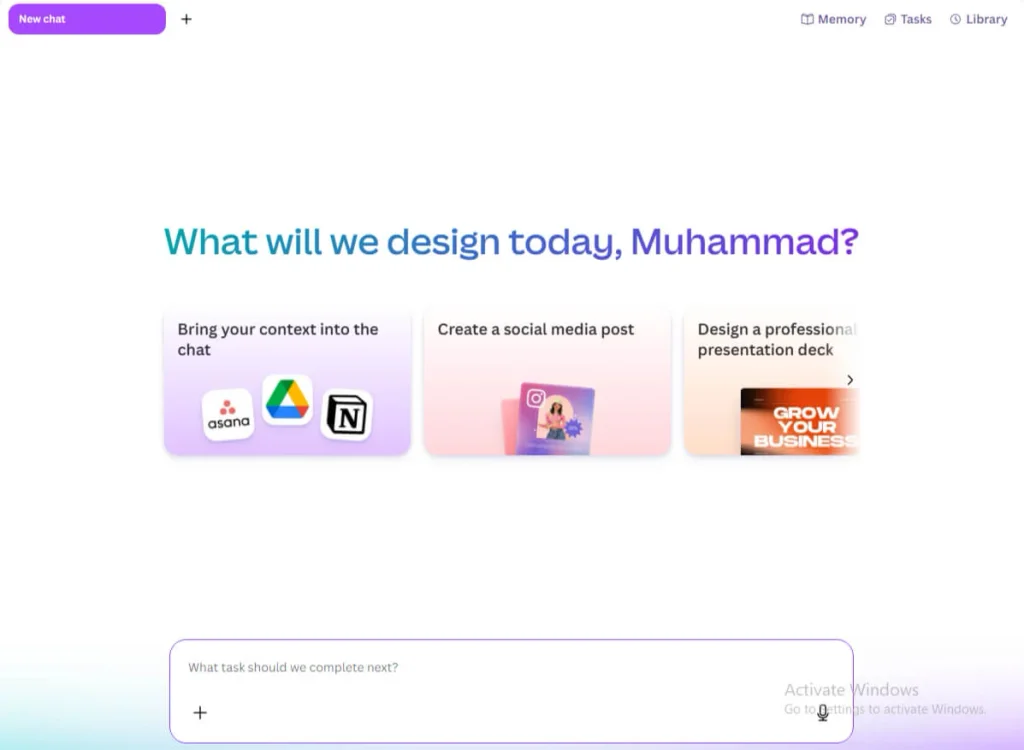
Canva’s built-in AI features, grouped under what it calls Canva AI, have genuinely changed how fast a design comes together, and they’re worth picking up even as a total beginner.
Magic Write generates text content directly inside your design, handy for captions, headlines, or filler copy you’ll edit later anyway.
Background Remover strips the background off any photo in a couple of clicks, no separate software required.
Magic Eraser lets you paint over and delete unwanted objects from a photo, like a stray person lurking in the background of an otherwise good shot. And
Text to Image generates original artwork from a written description, which comes in genuinely handy when stock photos just aren’t cutting it for once. Most of these live under the Apps tab in the side menu, or they’ll show up as a suggestion right when you’d actually need them.
How to Use Canva for Presentations
Presentations are one of Canva’s most-used formats, and honestly, they’re a lot less painful here than in traditional slide software most people grew up on.
Pick “Presentation” as your design type, then choose a template built specifically for slides rather than a single standalone graphic. Each slide works like its own mini canvas, and you can duplicate a slide, drag thumbnails around to reorder them, and add smooth transitions between slides from the Share menu. When it’s done, you can present directly inside Canva using its built-in presenter view, or just export the whole thing as a PDF or PowerPoint file if you need to hand it off to someone else.
Canva on Phone vs. Laptop: What’s Different
Canva works on both, sure, but the experience isn’t identical, and knowing the gap ahead of time saves a bit of frustration down the line.
Laptop Version
The laptop version gives you the full toolset. Complex multi-page projects, detailed element layering, and the desktop-only keyboard shortcuts are all just easier to manage on a bigger screen with an actual mouse.
Mobile App
The mobile app, available for both iPhone and Android, is genuinely great for quick edits, resizing an existing design, or knocking out a single social media post on the go, but some of the more advanced layout tools get trickier to manage with just a thumb. A good rhythm a lot of people fall into naturally: start bigger projects on a laptop, then lean on the phone app for quick touch-ups or last-minute changes later.
How to Use Canva’s Video Editor
Canva isn’t just for static images anymore, for what it’s worth. Its video editor handles a surprising amount for a tool that started out doing graphics and nothing else.
Choose a video-specific design type (something like “Instagram Reel” or “YouTube video”), then build it out of individual clips and photo frames arranged along a timeline at the bottom of the editor. You can trim clips, pull in background music from Canva’s built-in library, layer text and animations on top, and add transitions between scenes, all without ever leaving the browser tab. It’s not going to replace dedicated video software for anything genuinely complex, but for quick social content, it honestly holds up better than you’d expect.
How to Use Canva to Make Money
A fair number of people use Canva as an actual income source these days, not just a design tool for personal projects, and there are a few realistic paths into it.
Selling templates is probably the most common route. Canva runs a Creator program where you design templates and earn royalties whenever someone else uses them.
Freelance design work is another solid one, since plenty of small businesses specifically look for someone comfortable in Canva rather than pricier software, and it’s an easier tool to learn quickly enough to start taking paid work sooner.
Print-on-demand businesses lean on Canva heavily too, designing merch graphics that get uploaded straight to a print service afterward.
And a lot of social media managers build their entire client workload around Canva, since it’s fast enough to turn around a full week of posts in a single sitting if you know your way around it.
How to Use Canva for Business (Brand Kits & Teams)
For a small business, Canva’s team features solve a genuinely real problem: keeping everyone’s designs looking consistent without someone manually checking every single file that goes out.
- A Brand Kit stores your logo, brand colors, and fonts in one place, so anyone on the team can pull them into a new design without hunting down the exact hex code or the right logo file version again.
- Team folders keep projects organized and shared across everyone, and comment and approval tools let people give feedback directly on a design instead of going back and forth over email like it’s still 2010. None of this is exclusive to big companies, either. Even a one-person business benefits from a Brand Kit just to keep their own stuff looking consistent over time.
How to Use Canva for School (Students & Resumes)
Students end up using Canva constantly, mostly for two things: assignments and resumes.
Class Projects
For class projects, presentation templates, infographics, and posters all come together fast, and Canva’s free education plan (available to verified students and teachers) unlocks a decent chunk of the Pro features at no cost, which is a nice bonus.
Resume
For resumes, search “resume” in the template bar to find dozens of clean, professional layouts, then swap in your own information. One tip worth knowing here: keep the layout fairly simple if you’re applying somewhere that uses automated resume-scanning software, since some of the heavily designed templates with unusual columns or graphics can actually confuse those systems.
Canva Free vs. Canva Pro: What Actually Changes
This is one of the most-searched questions about Canva, and the honest answer is that the free plan is genuinely usable long-term, not just some limited trial dressed up as free.
| Canva Free | Canva Pro | |
| Cost | $0, no time limit | Around $12.99/month (billed monthly) or roughly $120/year |
| Templates & elements | Large library, some marked Pro-only | Full access, including premium templates |
| Background Remover | Not included | Included |
| Brand Kit | One basic kit | Multiple kits, more storage |
| Resizing designs | Manual | One-click resize to different formats |
| Storage | 5GB | 1TB |
Canva Free doesn’t expire, which is the part people are always surprised by. There’s no countdown forcing you to upgrade eventually, unlike how a lot of “freemium” software tends to work. Pro’s genuinely worth it once you’re designing often enough that the Background Remover and one-click resizing start saving real time, but plenty of casual users never actually need to upgrade at all.
Canva vs. Photoshop vs. CapCut: Which Do You Actually Need
These get compared constantly, but honestly, they’re not really solving the same problem in the first place.
Canva vs. Photoshop
Photoshop’s built for deep, pixel-level photo editing and genuinely professional design work, and it comes with a real learning curve to match that power. Canva’s built for speed and templates instead, not precision editing. If you’re retouching photos for a living, you want Photoshop. If you’re making a social media post in the next ten minutes, you want Canva, full stop.
Canva vs. CapCut
CapCut’s a dedicated video editor with far deeper video-specific tools, better suited to longer or more complex edits. Canva’s video editor is fine for quick, simple content, but CapCut’s the stronger pick for anything more involved than that. A lot of creators genuinely use both side by side, Canva for graphics and thumbnails, CapCut for the actual video editing work.
Common Canva Mistakes Beginners Make
A few habits show up constantly with people just getting started.
Using too many fonts in one design is probably the biggest offender. Canva itself recommends sticking to two, maybe three at most, since piling on more makes a design look cluttered fast, even when each individual font looks fine on its own.
Ignoring the grid and alignment tools is another common one, since elements that aren’t lined up properly are one of the quickest ways a design ends up reading as amateur, even when the pieces themselves look good. Skipping the Brand Kit if you design regularly just means redoing the same color and font choices over and over instead of setting them once and being done with it. And downloading in the wrong file format trips people up more than you’d think.
PNG keeps a transparent background if you need one, JPG doesn’t, and PDF’s are usually the right call for anything headed to a printer.
Watch: How to Use Canva (Video Guide)
Plenty of people pick this up faster just by watching someone click through it themselves. There’s no shortage of solid, well-reviewed Canva tutorials on YouTube covering everything from total-beginner basics to more advanced tricks like brand kits and the AI tools. Searching “Canva tutorial for beginners” turns up several well-regarded, regularly updated options that pair nicely with this guide.
Frequently Asked Questions
How do I use Canva?
Sign up for a free account, pick a design type and size, choose a template, customize it with your own text and images, then download or share it. The full breakdown’s in the step-by-step section above if you need more detail.
Is Canva easy for beginners?
Yes, genuinely. The drag-and-drop editor and template-first approach mean you don’t need any design background at all to end up with something that looks professional on your first real attempt.
What is Canva mostly used for?
Social media posts, presentations, resumes, flyers, and short videos are the big ones. It’s built for everyday visual content, not specialized professional design work that needs pixel-level control.
Is Canva really free to use?
Yes. The free plan has no expiration date and covers a genuinely large template and element library on its own. Pro adds extras like the Background Remover and one-click resizing, but it’s not required to use Canva properly.
How long can I use Canva for free?
Indefinitely, honestly. There’s no trial countdown running on the free plan, unlike a lot of other freemium software out there.
How much is Canva Pro for one month?
Around $12.99 billed monthly in the US, or a lower effective rate if you pay for the whole year upfront. Pricing can shift a bit by region, so it’s worth double-checking Canva’s own pricing page for the exact current number.
Can I use Canva offline?
Only in a limited way. The mobile app lets you keep editing a design you already had open if you lose connection mid-session, but you’ll generally need an internet connection to load templates, save changes, or start something brand new.
Key Takeaways
Canva really comes down to four things clicking into place: picking the right size for whatever you’re making, leaning on templates instead of starting from a blank canvas, knowing what each tab in that side menu actually does, and picking the right file format once you’re ready to export. Head back to the homepage to browse more no-fluff guides across every category
Once those habits settle in, the AI tools, the mobile app, and the business features all just build right on top of that same basic flow. Whether you’re a student throwing together a resume the night before it’s due, a small business keeping its branding consistent, or someone genuinely trying to make money designing templates on the side, the learning curve here is one of the shortest in the entire design-software world, which is really the whole reason Canva took off the way it did in the first place.